Standard Dartboard Height and Throwing Distance
Imagine you’re setting up a dartboard for your local league tournament, and you want to guarantee everything meets regulation standards. The height of the dartboard should be 5 feet 8 inches from the floor to the Bulls Eye, and the throwing distance must be 7 feet 9.25 inches from the front of the board to the throwing line. You might think it sounds simple, but the precision required can be quite challenging. How do you make sure your measurements are accurate, and what tools can help you achieve this?
Key Takeaways
- The regulation dartboard height is 5 feet, 8 inches, from the floor to the bullseye.
- The standard throwing distance is 7 feet, 9.25 inches, from the front of the dartboard.
- Measuring diagonally from the bullseye ensures precise setup for both steel-tip and soft-tip dartboards.
- Consistent dartboard height and throwing distance maintain fair gameplay and standardisation.
- Adequate space, lighting, and protective surroundings enhance visibility and safety.
Regulation Dartboard Height
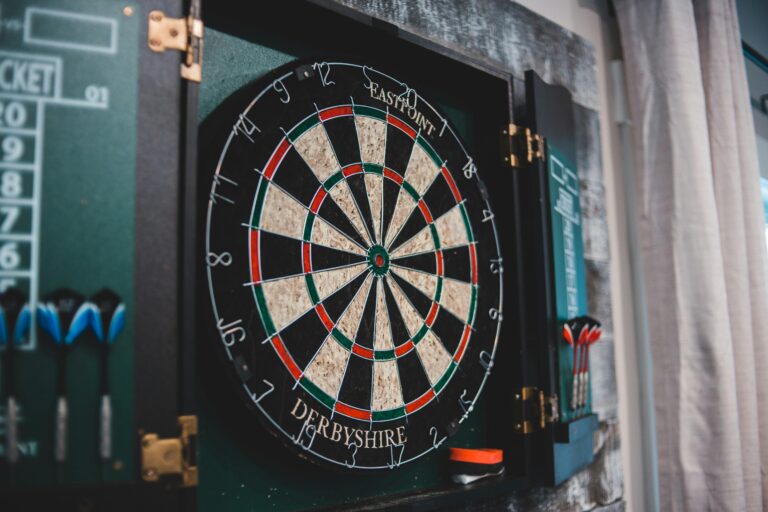
To guarantee fair and consistent gameplay, the regulation dartboard height is set at 5 feet 8 inches from the floor to the Bulls Eye. This height is approximately 173 cm. Ensuring your dartboard is at the correct height is vital for maintaining accurate scoring and gameplay standards. It provides a level playing field for all participants, whether you’re at home, in a pub, or at a professional venue.
Consistency in dartboard height is essential for standardisation across different playing environments. When you practice or compete, you’ll want to know that the setup is the same everywhere. This uniformity helps players hone their skills and improves the overall experience. Proper height also aids in player alignment, making it easier to develop a consistent throwing technique.
Most setups are wall-mounted, which makes it easier to achieve and maintain the regulation height. In pubs and dedicated venues, this is often the standard configuration. By adhering to these guidelines, you ensure that every game is fair and competitive, allowing players to focus on their techniques and strategies without worrying about inconsistencies in the setup.
Measuring Throwing Distance
To accurately measure the throwing distance, start from the front of the dartboard and measure out 237 cm (7 feet, 9.25 inches) to the throwing line.
Make sure to check if alternative distances are needed for ladies or juniors, as these may be shorter.
Guarantee there’s at least 2 feet of clear space on either side of the dartboard for safe play.
Proper Measuring Techniques
When setting up your dartboard, ensuring the throwing distance is accurate is crucial for fair and consistent gameplay. The standard throwing distance is 237 cm (7 feet, 9.25 inches) from the front of the dartboard to the throwing line. This precise measurement helps maintain the integrity of the game, allowing for accurate scoring and proper player positioning.
To measure this distance correctly, start by using a quality tape measure. Place one end at the front of the dartboard and extend it to the floor, ensuring it’s straight. Mark the spot at 237 cm (7 feet, 9.25 inches) to indicate where the throwing line should be.
If your floor is uneven, measure the distance diagonally for the most precise results. Start from the bullseye and extend the tape measure to the floor at an angle. This ensures the true distance is maintained, preventing any gameplay inconsistencies.
Double-check your measurements to confirm they’re accurate. It’s a small effort that makes a significant difference in how your games play out.
Distance Regulations
Guaranteeing the correct throwing distance is a fundamental aspect of dartboard setup, directly impacting the fairness and consistency of gameplay. The standard throwing distance from the front of the dartboard to the throwing line is 7 feet, 9.25 inches (237 cm). This distance guarantees that all players have an equal challenge, maintaining the integrity of the game.
For ladies and juniors, different distances might apply. Common variations include 7 feet 6 inches or even 7 feet, making the game more accessible. Always check the specific regulations of your league or competition to be certain.
Safety and space are also important. You should have at least 2 feet of clear space on each side of the dartboard. This minimises the risk of injury, especially since steel-tip darts can be dangerous if mishandled.
Measuring the throwing distance accurately is crucial, especially on uneven surfaces. You can measure diagonally from the bullseye to the throwing line for precision. This method ensures that even if the floor isn’t perfectly level, the distance remains correct.
Clearance and Safety
Ensuring proper clearance and safety around your dartboard setup is essential for a smooth and enjoyable game.
Make sure you’ve got at least 2 feet of space on each side to prevent obstructions and reduce the risk of accidents.
Don’t forget to take into account proper lighting and protective surroundings to enhance both visibility and safety.
Adequate Space Requirements
To play darts safely and comfortably, make sure you have at least 2 feet of clear space on each side of the dartboard. This clearance is essential for several reasons. It allows players to throw darts without obstruction, reducing the risk of accidents and ensuring that everyone can move freely.
Additionally, having adequate space minimises the chances of hitting walls or other objects, which can damage both your darts and your surroundings.
When setting up your dartboard, keep the following points in mind:
- Player Safety: Clear space prevents accidental contact with walls or objects, keeping both players and bystanders safe.
- Ease of Movement: Adequate room ensures players can comfortably move around without bumping into anything.
- Spectator Space: Free space around the dartboard lets spectators watch the game without interfering with players.
- Enhanced Experience: A well-spaced area enhances the overall playing experience, making it more enjoyable and less stressful.
Proper Lighting Conditions
Good lighting around your dartboard is vital for clear visibility and accurate aiming. It prevents shadows and glare that could interfere with your gameplay. The recommended lighting height is around 7 feet. This height ensures that the light doesn’t obstruct your view and spreads evenly across the board. You want to make sure every part of the dartboard is illuminated, making it easier to aim and hit your targets.
LED lights are an excellent choice for illuminating your dartboard. They’re energy-efficient, bright, and provide consistent lighting. This type of lighting helps enhance your overall dart-playing experience. You won’t have to worry about changing bulbs often, and the light remains steady, allowing you to focus on your game.
Bright, focused lighting is essential. It helps you see your targets clearly, reducing eye strain and allowing for better precision. By setting up proper lighting conditions, you’re not only improving the quality of your game but also ensuring safety. Shadows and uneven lighting can lead to misthrows, which could be risky.
Protective Surroundings Setup
While proper lighting enhances your game, creating a safe playing area with adequate clearance and protective surroundings is equally vital. Guaranteeing there’s a minimum of 2 feet of clearance on both sides of the dartboard helps maintain a safe environment. This prevents stray darts from causing injuries or damaging nearby objects.
Positioning the dartboard flush to the wall is essential. It prevents any tilting or leaning forward during play, which can affect your game and potentially lead to accidents. The standard throwing distance is 7 feet 9 1/4 inches (2.37 metres) for steel tip darts, so make sure your space accommodates this.
To further protect your surroundings and equipment,
- Implement protective backings or dartboard surrounds to shield your walls from stray darts.
- Use a dart mat to protect your floors and prevent darts from bouncing.
- Keep the area clear of any fragile items or valuables.
- Ensure proper lighting to help players see clearly and avoid mistakes.
Following these guidelines not only ensures safety but also promotes fair and consistent gameplay. Setting up your dartboard area with these precautions will provide a more enjoyable experience for everyone involved.
Horizontal Distance Setup
Ensuring the throwing line is exactly 7 feet 9 1/4 inches from the front of the dartboard is essential for fair gameplay and accurate scoring. This specific distance is vital for both steel-tip and soft-tip dart games. By adhering to this measurement, you’re making sure that every player has an equal chance to perform their best.
Consistency in the horizontal distance setup helps maintain a level playing field and guarantees the integrity of the game.
To achieve this, use a tape measure to mark the precise distance from the front edge of the dartboard to the throwing line. Make sure the line is clearly visible and straight. It’s a simple step, but it can make a significant difference in your dart game experience. Properly marking the throwing line means players can align themselves correctly, which enhances accuracy.
Following the official throwing distance guidelines not only guarantees fairness but also improves your overall game. Consistency in your setup leads to better practice and, ultimately, better performance. So, take the time to measure and mark your throwing line accurately. Your dart game will be all the better for it.
Diagonal Distance Setup
To set up the diagonal distance correctly, measure from the bullseye to the throwing line using the specific distance for your dartboard type. This guarantees your dartboard is positioned for fair gameplay and accurate scoring. For steel tip dartboards, the diagonal distance is 9 feet, 7 5/8 inches (2.93 metres). If you’re using a soft-tip dartboard, the distance changes slightly to 9 feet, 9 1/2 inches (2.98 metres).
Adjusting the diagonal distance based on the type of dartboard is crucial. It ensures a consistent playing experience, whether you’re practicing or competing. Here’s a quick guide to setting up your diagonal distance:
- Measure from the bullseye: Start at the centre of the bullseye and extend your measuring tape to the throwing line.
- Use the correct distance. Remember the specific measurements for steel tip (2.93 metres) and soft tip dartboards (2.98 metres).
- Ensure alignment: Double-check that the dartboard is level and the throwing line is straight.
- Check and recheck: Accuracy is key, so measure twice to guarantee the correct setup.
Choosing the Right Wall
After setting the correct diagonal distance, it’s important to choose a sturdy and flat wall to mount your dartboard securely. Start by using a stud finder to locate a solid support structure within the wall. This guarantees that your dartboard won’t wobble or fall off during gameplay. Uneven or moveable surfaces are a no-go; they can throw off your darts and damage your wall.
Think about adding a backboard or dartboard surround. These accessories not only protect your wall from stray darts but also give a more vital look to your setup. They come in various materials and styles, so you can pick one that suits your space best.
Proper wall selection is essential. It maintains the correct dartboard height and distance, which are necessary for accurate and enjoyable gameplay. A good wall will keep your dartboard steady, ensuring that every throw counts. Plus, a sturdy wall minimises the risk of injury from falling boards or bouncing darts.
Using a U-Shaped Bracket
Installing a U-shaped bracket is crucial for securing your dartboard at the correct height and guaranteeing it stays stable during gameplay. Start by marking the proper height on the wall at 5 feet, 8 inches (1.73 metres). This guarantees your dartboard aligns with official standards.
Next, attach mounting feet or spacers to the back of the dartboard. These components help keep the dartboard flush against the wall and provide necessary support. Drive the dartboard centre screw into the back of the dartboard, leaving enough space to hang it securely on the bracket.
Now, it’s time to install the mounting bracket on the wall. This bracket will support the weight of the dartboard and keep it in position.
Follow these steps:
- Mark the correct height on the wall.
- Use a level to ensure the bracket is straight.
- Secure the bracket firmly with screws.
- Test the bracket’s stability before hanging the dartboard.
Using a QuickFit Bracket
When using a QuickFit Bracket, start by marking a spot on the wall at 5 feet, 8 inches from the floor. This height guarantees your dartboard is positioned correctly. Once you’ve made the mark, align the hole in the QuickFit Bracket with it. Securely drive the mounting screws into place, making sure the bracket is firmly attached to the wall.
Next, apply the mounting disc to the back of your dartboard. This disc allows for easy attachment to the bracket. With the disc in place, slide the dartboard onto the bracket. Give it a gentle nudge to make sure it’s securely in place and won’t wobble during gameplay.
To complete your setup, use Pro Line Oche Tape to mark the correct throwing distance on the floor. This distance is essential for maintaining the standard gameplay experience. Position the tape at the appropriate length from the dartboard, making sure it’s straight and clearly visible.
With these steps, your dartboard should be securely mounted and ready for play. By following these straightforward instructions, you’ll create a reliable and professional setup for your darts games. Enjoy your game with confidence, knowing you’ve done it right!
Enhancing Your Setup
Elevate your dartboard experience by incorporating essential accessories that add both functionality and flair to your setup. First, consider adding tools like the Viper Pro Line Throw Line Marker Tape or the Viper Lighted Dart Throw Line. These tools help you guarantee an accurate throwing distance every time you play.
To make certain your dartboard is mounted securely and at the correct height, the Viper Steel Tip Dartboard Wall Mounting Hanger Kit is an excellent choice. It makes setup a breeze and keeps your dartboard stable. For those who prefer a more visible throw line, the Viper Edge Throw Line Marker is a perfect addition.
Staying informed about the latest dart-related topics can also enhance your setup. Read recent articles and explore tips on improving your dart skills and expert advice on dart techniques. Additionally, subscribing to Dart Brokers offers you exclusive deals and access to a community of dart enthusiasts.
Here are some must-have accessories to enhance your dartboard setup:
- Viper Pro Line Throw Line Marker Tape
- Viper-Lighted Dart Throw Line
- Viper Steel Tip Dartboard Wall Mounting Hanger Kit
- Viper Edge Throw Line Marker
Utilise these resources to transform your dartboard area into a professional setup.
Conclusion
By ensuring your dartboard is set at the regulation height of 5 feet 8 inches and the throwing distance is 237 cm, you’ll create a fair and enjoyable playing environment.
Proper setup, including using brackets and choosing the right wall, enhances your experience. These precise measurements aren’t just rules—they’re the foundation for consistent gameplay.
So, measure carefully, set up correctly, and enjoy the game with confidence and fairness. Happy darting!


